ACH Positive Pay
How It Works
Accessing ACH Positive Pay
Follow these steps if you are an authorized user for ACH Positive Pay.
- 1
Log in to business online banking
- 2
On the main page, select ‘Positive Pay HQ’

Manage Approved and Block Lists
ACH Positive Pay
- 1In the menu bar, select ‘Change Module’ and ‘ACH Positive Pay’
- 2
Select ‘Manage’ in the menu bar, and then either ‘Approved List’ or ‘Block List’
- 3
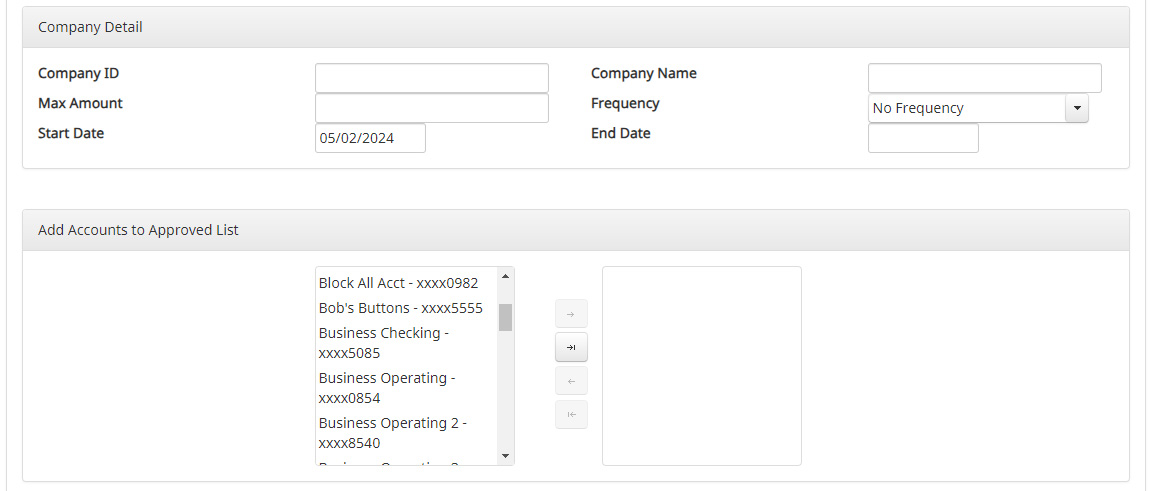
Select ‘Create’ to add a new Company ID
- 4
Enter the required information for the Company ID
- 5
Click ‘Save’ to add the Company to the applicable list
- 6
Repeat the process for each Company ID you’d like on either the approved or block lists.
ACH Credit
- 1In the menu bar, select ‘Change Module’ and ‘ACH Credit Block’
- 2
Select ‘Manage’ in the menu bar, and then either ‘Approved List’ or ‘Block List’
- 3
Select ‘Create’ to add a new Company ID
- 4
Enter the required information for the Company ID
- 5
Click ‘Save’ to add the Company to the applicable list
- 6
Repeat the process for each Company ID you’d like on either the approved or block lists.
Manage User Notifications
ACH Positive Pay
- 1
In the menu bar, select ‘Change Module’ and ‘ACH Positive Pay’
- 2
Select ‘Manage’ in the menu bar, and then ‘Notification Rules’
- 3
In the ‘Selection’ Tab, move all applicable accounts from ‘Select Account(s)’ to ‘Account(s) Selected.’ Then, click ‘Next’
- 4
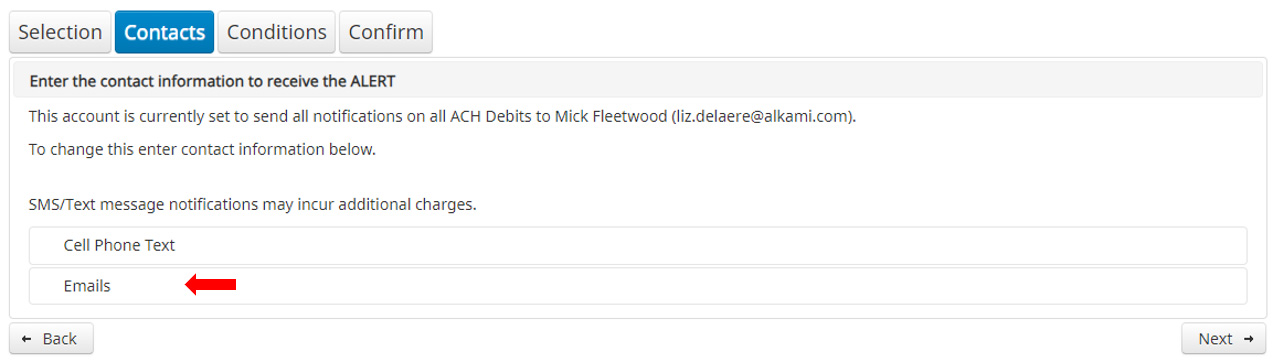
In the ‘Contacts’ Tab, click ‘Emails’ to add users who should receive the notifications. Then, select ‘Next’
- 5
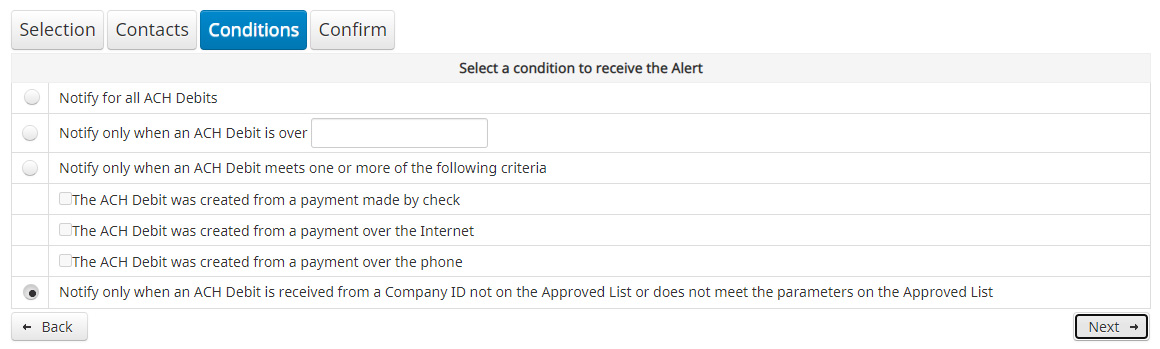
In the ‘Conditions’ Tab, select the condition for when the users should receive the notifications. We suggest using ‘Notify only when an ACH Debit is received from a Company ID not on the Approved List or does not meet the parameters on the Approved List.’
- 6
In the ‘Confirm’ Tab, expand the arrows to review the rules. When correct, click ‘Save’
ACH Credit
- 1
In the menu bar, select ‘Change Module’ and ‘ACH Credit’
- 2
Select ‘Manage’ in the menu bar, and then ‘Notification Rules’
- 3
In the ‘Selection’ Tab, move all applicable accounts from ‘Select Account(s)’ to ‘Account(s) Selected.’ Then, click ‘Next’
- 4
In the ‘Contacts’ Tab, click ‘Emails’ to add users who should receive the notifications. Then, select ‘Next’
- 5
In the ‘Conditions’ Tab, select the condition for when the users should receive the notifications. We suggest using ‘Notify only when an ACH Credit is received from a Company ID not on the Approved List or does not meet the parameters on the Approved List.’
- 6
In the ‘Confirm’ Tab, expand the arrows to review the rules. When correct, click ‘Save’

Exception Review
If ACH transactions are presented for payment and do not match your approved and block list criteria, ACH Positive Pay users will be notified via email at 7:00 AM CST and again at 9:00 AM CST if items are not reviewed. Users must log in to Positive Pay HQ by 11:00 AM CST to review exception items. If items are not reviewed by the cut-off time, they will be either paid or returned, depending on the Client’s default selection. Follow the steps below to review exception items:
- 1
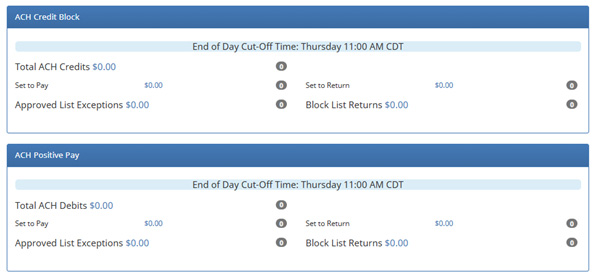
On the main screen of Positive Pay HQ, in the ACH Positive Pay and ACH Credit Block boxes, click on the Exceptions dollar amount. If the amount is $0.00, there are no exceptions to review.
- 2
In the Transactions History screen, review the exception items listed by clicking on the arrow to the left of the item to show additional details.
- 3
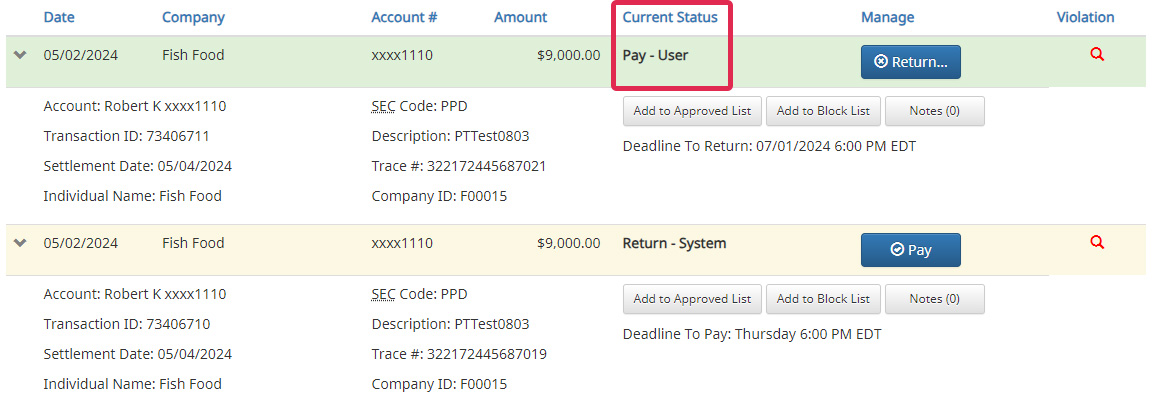
The current status of the exception item is shown in the Current Status column. To change the decision of the item, click the blue button in the Change Status column. Only click the blue button if you want to change the Current Status.
- 4
If you change the status, the Current Status column will change to either Return-User or Pay-User to indicate that a user changed the status.
- 5
Review all exception items listed and determine whether they should be paid or returned. Decisions must be completed by 11:00 AM CST.
If item(s) are being returned due to fraud, contact our team. We will work with you to open a new account to mitigate additional fraud and further protect your account.
Best Practice Tips
Daily Processes
- Consider setting reminders before the 11:00 AM CST cut-off time
- Missing the cut-off time will result in default processing by the Bank
- Determine backup processes to ensure daily coverage
Accuracy Matters
- Ensure ACH Company IDs are properly added to the Approved Lists to avoid unnecessary exceptions
Fraud Prevention
- Review exceptions carefully – this is your chance to stop unauthorized transactions
- Use the Pay and Return decisions strategically to protect your accounts
- Notify us if you return items due to fraud
Frequently Asked Questions
Additional Resources
1 ACH Positive Pay does not support International ACH Transactions (IAT) or with international SEC Codes. Additionally, ACH Positive Pay does NOT support “on-us” transactions or items that are handled entirely within the Bank, meaning the Bank is both the issuer and the presenter.